Wednesday, November 30, 2011

The Demon Chronograph

For my birthday, my girlfriend got me a chronograph.  It pays to be specific about birthday wishes.  My first little test run was a real eye opener.  First, my bullets were quite a bit slower than I expected.  They were going about 1150 feet/second.  I have been progressively downloading to my current 62 grains of blackpowder to gain accuracy.  I’m guessing that it is no accident that my muzzle velocity is right at the speed of sound (1126 ft/s).  The second shocker was the amount of variation.  In 9 rounds I had speeds from 1105 Ft/s to 1193 Ft/s. 

It was time to do a little testing.  I decided to make a batch of 20 rounds in my usual manner, and then make a batch with careful control of bullet weight, case weight, and powder load.  The goal is to see if the careful assembly method yields any real benefits.

Because of limitations on components I have available, the loads aren’t 100% the same as what I compete with, but they are a good standard load.

My base line load:

Creedmoor swaged bullet from Buffalo arms.  510 grain advertised wt. at .459diameter. 20:1 lead:tin.
62.5 grains FFG Swiss blackpowder.
Cases are FC (Federal) nickel plated.
Primers are Winchester Large Rifle Magnum (WLRM).
.030 fiber wad between the bullet and powder. 
Lube SPG as delivered from Buffalo Arms.  No lube cookie.

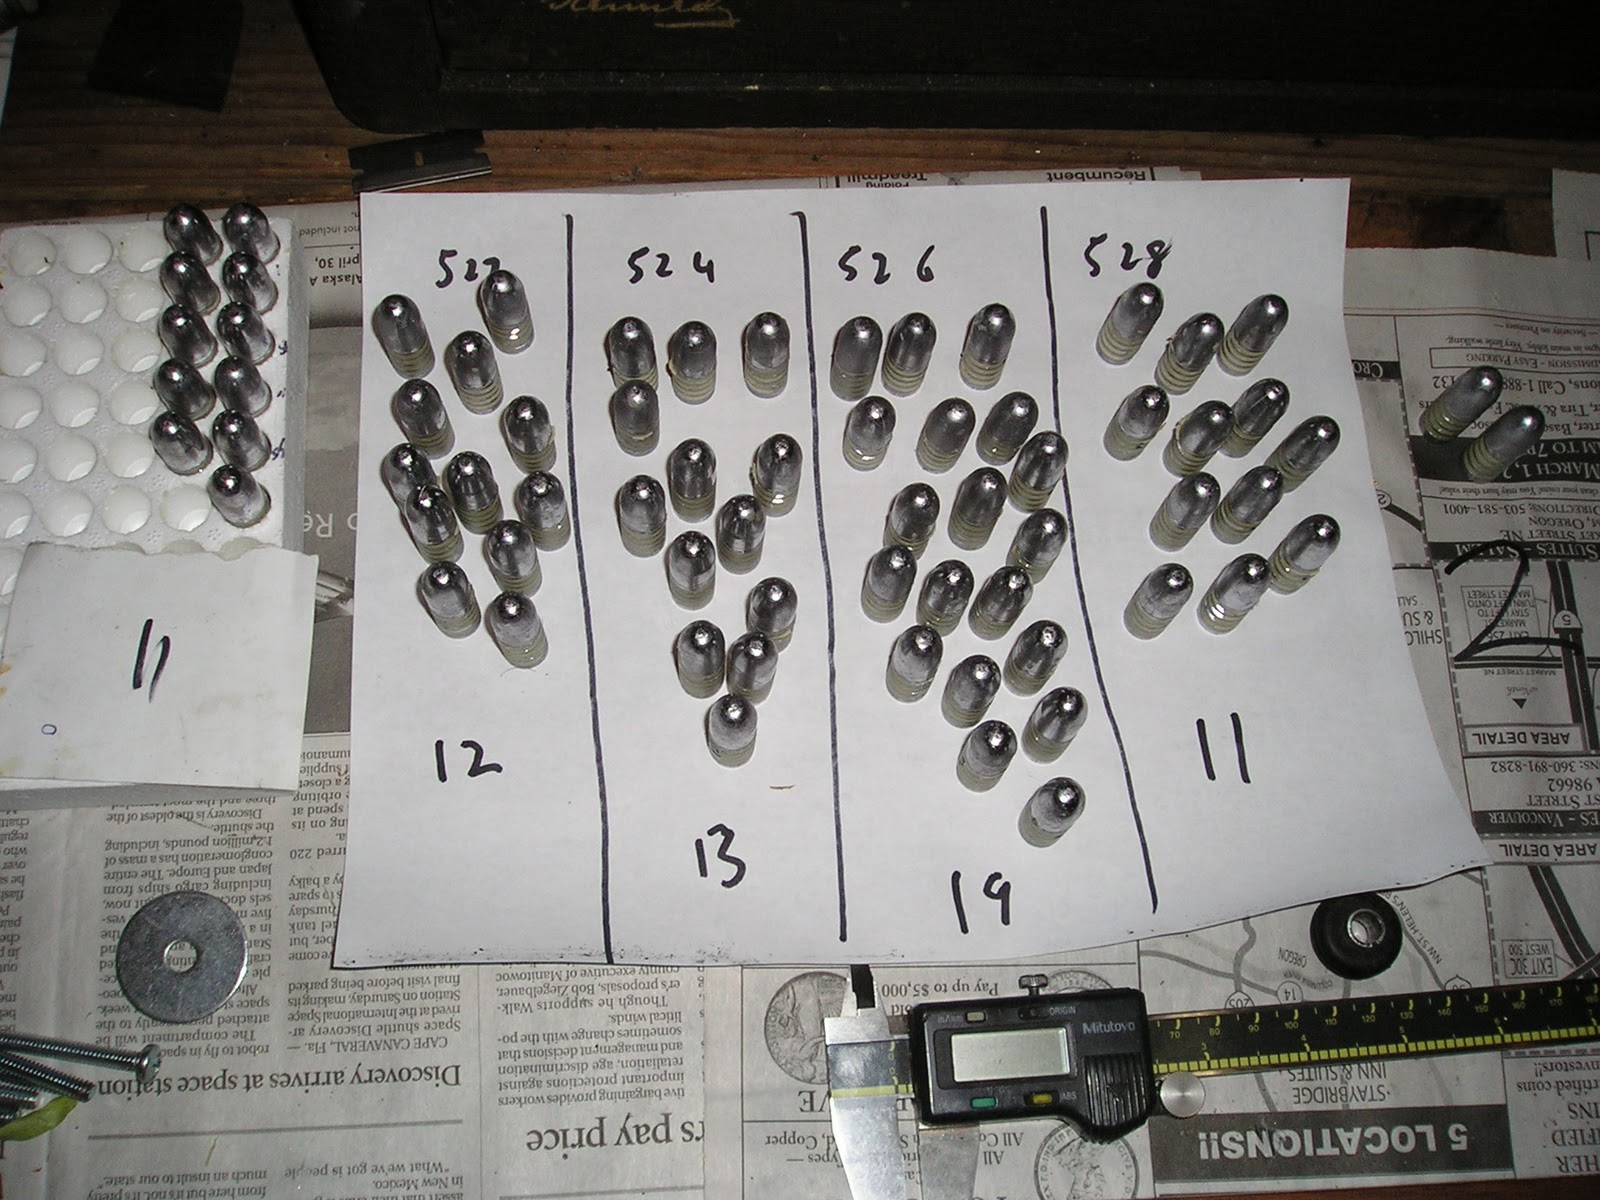
Weighing the cases (cleaned and decapped), they weighed between 180.2 and 191.4 grains.  For the “precision” loads I gathered 14 that were between 190.0 and 190.5 grains.

Bullets ranged from 512.9 to 514.5 in lubed condition.  For precision loads I used a range from 513.0 to 513.1.

For the “precise” powder load I carefully weighed and “trickled” the charge at 62.5 grains.  My scale reads to the tenth, and is pretty responsive, so I’d guess a range of  62.45 to 62.55 is not unreasonable.  For the “random“  load, I set the barrel measure to 62.5 and just threw them as they came out.  This is pretty much how I make my regular ammo, except I measure about 1 in 10 to be sure I’m not wavering into a dangerous loading.  The results were measured and shown on this graph:


Powder weights as thrown sequentially from an Ideal "55" barrel measure.

One interesting find is the progressive increase in the load and the progressive increase in variation.  It certainly looks like a regular check is in order when I’m doing my typical quantity of 60 or so for a match.

The data I expected to see was a “precise” load that had a slightly narrower band of variation than the “random” load.  I also expected that the averages of the 2 loads would be roughly the same, as they are both the same basic load.  I could not have been more wrong.

The average velocity of the random group was 60 ft /s slower than the precise loads.  Also, the standard deviation of the random loads was 6.7, which is better than the 7.74 of the precise loads.

 Muzzle velocity for "random" and "precise" ammo groups.
Another interesting note is the progressive increase in velocity of the random group, but not the precise group.  I can think of two possible reasons for this velocity climb.  First is the idea that fouling increases through the string of shots.  One would expect a lowering velocity with increased fouling, but there is a slight potential that as fouling holds back the bullet, the increased burn temperature leads to more efficient combustion, so the velocity increases through the last portion of the barrel.  Unlikely, I know.  The second, and more likely possibility is that as my barrel warms, the velocity goes up.  This could either be due to a warmer powder charge burning more efficiently, or due to an expanded barrel having less drag on the bullet.  I will say it was a chilly day, and my barrel warms quite noticeably during a string of shots.  This explanation might also explain the higher velocities of the precise loads.  I shot that string directly after the random string, with only a cleaning in between.  The barrel would have been significantly warmer.

For future tests, I may alternate shots between groups.  The more mathematically correct method would be to randomize the shooting sequence.  I also may wire up the barrel with some thermocouples and do some testing at different temperatures.

One bit of information I was interested in was how much effect the velocity veriation would have on elevation placement of the shots.  I used a simple on-line ballistic calculator to give me the drop at 200 yardsm, then corrected the numbers to zero my lowest shot.  The graph looks the same as the velocity graph, but the scale of the Y axis is an eye opener.

Variation in elevation solely due to velocity variation.

It appears a full 2 inches of group height can be attributed to velocity variation.  Also, the differences in elevation of the two groups is approximately 4.5".  It is starting to look like this is a reasonable place to start chasing accuracy.

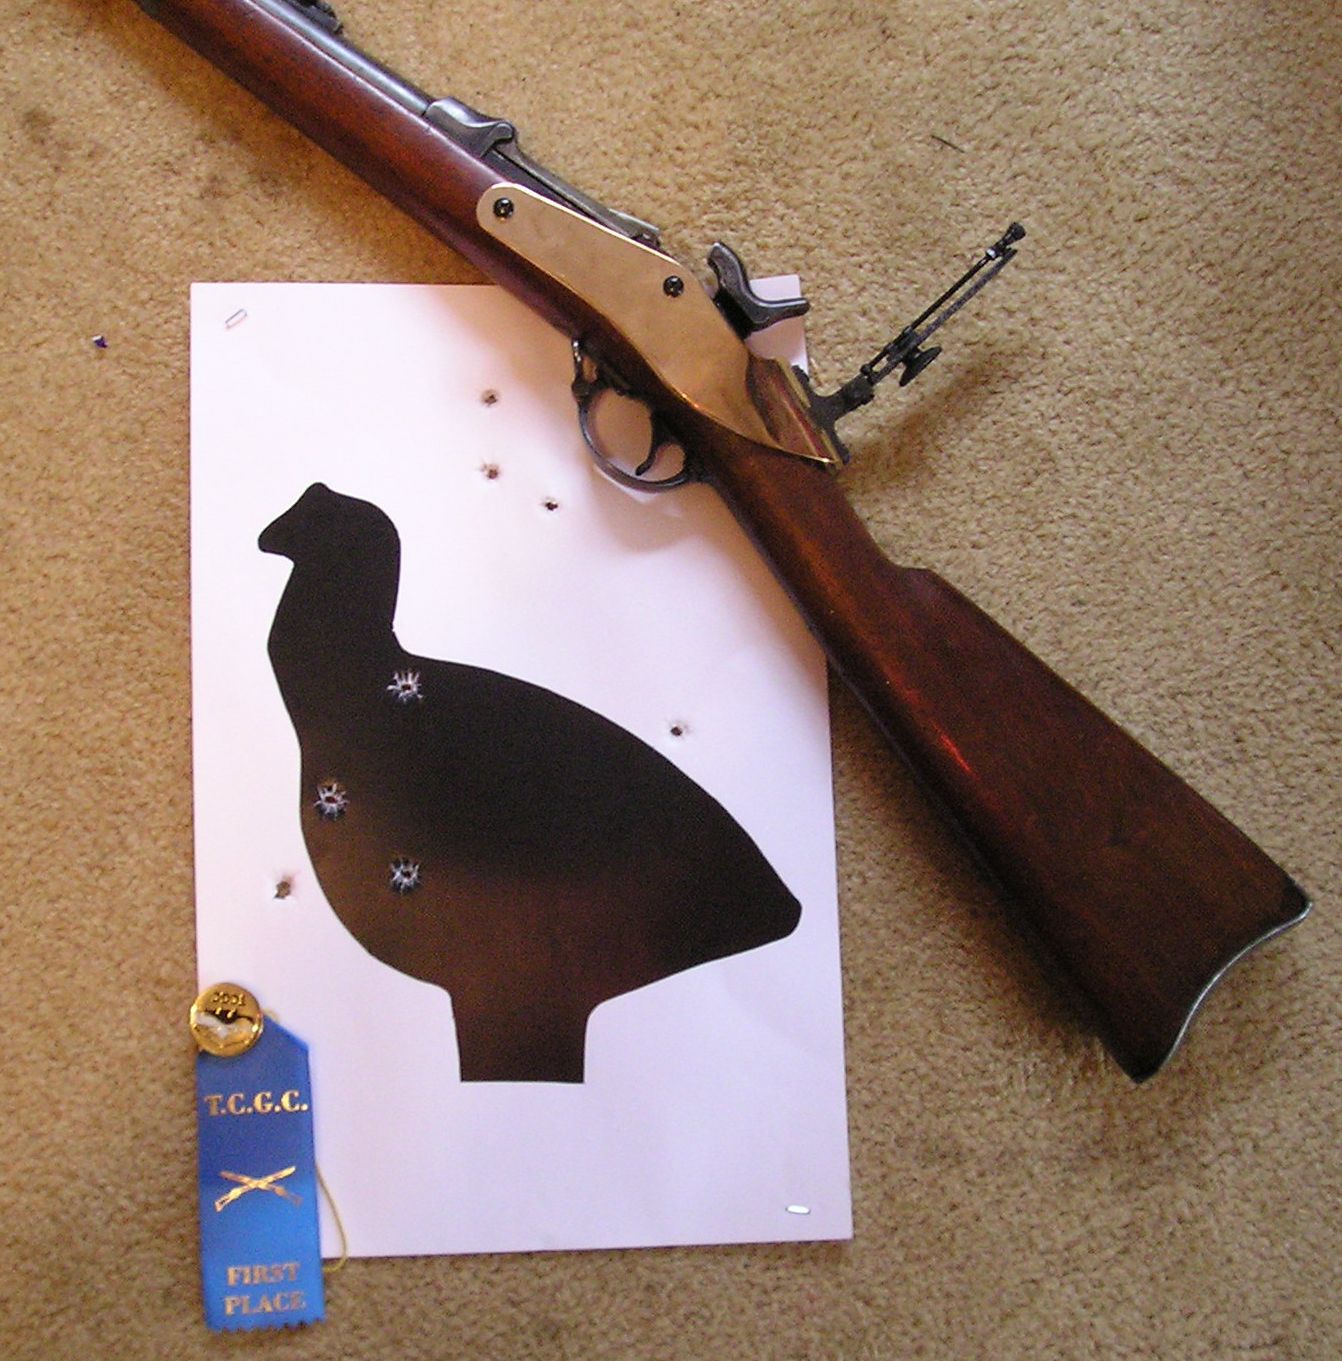
I’d like to show you my targets and try to correlate the velocities to accuracy, but the weather was a slight fog that improved throughout the session. The change in conditions was great enough that I wouldn’t really trust any conclusions.

All this points to a lot more loads and a lot more testing.  All blame is to be placed on the Demon Chronograph.

Monday, October 31, 2011

Chickens aren't just for shooting at.

For my birthday I picked up a new spotting scope in my birthday stocking, or was that under the birthday tree?  Either way, it is a nice piece of glass that picks those .45 holes out at 200 yards no problem and should be good much further.  600 yards might be a stretch, but the range I normally shoot at has target markers, so I should be fine either way.  With the new scope comes the understanding that my old camera tripod is just not up to snuff.  It is wiggly, doesn't adjust smoothly, and it always seems like there's a leg in the way.  It is time for a project.

I've been wanting one of those "single pole" scope stands.  Most of them seem pretty simple, with just a base, pole, and adjustable slider for the scope.  I can buy one for $250, but being recently unemployed, again, I opt for "time cost" over "money cost."  As it turns out I have a plate of steel, a pole, and some shaft collars sitting in my metal knick knack pile.  With a little bandsaw time and some drill and tap work, here is the result


I chose the chicken because it is the most nefarious of the steel animals, since we always shoot it offhand.  The plate is only 1/4" thick.  It would of been nicer with 3/8.  I'll probably end up throwing a couple of sandbags on it if it gets windy.  If you can find one as a castoff from your range, so much the better.  One nice feature to note is the short threaded rod pushing on the body of the scope.  I'm always finding the "loosen, move, tighten" setups of most stands and tripods to be futzy.  The threaded rod lets me dial in elevation nice and smoothly.  I don't have anything like this for azimuth (windage), but I'll work something up if it seems like I need it.


As you can see, I've left an Allen wrench here and there.  I'll swap the screws out for knurled thumbscrews when I get a chance.

It is currently set up for concrete, with the 3 leveling screws.  I'll probably make some spikes, shaped like big vicious acorn nuts, to put on the screws when used in grass or gravel.

Anyway, right now, the total cost is 0$, which suits me fine.


Current $per shot = $2.89
Current % shipping costs = 8.88%

Sunday, October 9, 2011

Keeping on an even keel.

At my last competetive shoot, I noticed a phenomenon that has become more pronounced lately.  My groups are becoming wider than they are tall.  There can be any number of reasons for this, but the basic mechanism is that my groupings have become shorter by a bit, but unhanged in width.  One potential reason is that since I am shooting at silhouette shapes that are longer than they are tall, my sight picture is imprecise from side to side.   Shown here is a target that would certainly have been a 10 if I had a bit of horizontal control.


While this is a pretty good target for me, I must admit that most of the people I shoot against have groups about 1/2 the size.  I can't do much about my target shape, but I considered trying something the fine Black Powder Cartridge Rifle vendors use to tempt me out of my money.  That thing is a bubble level.

Bubble levels aren't particularly expensive, but I'm not going to find one as a simple add on to my cobbed together front sight, so I decided to make a home "proof of concept" version before I went to the effort of mounting the real thing.  I forsed the glass out of a cheap level and glued it in place with Shoe Goo.  Shoe Goo used to be the best adhesive known to man when it was clear.  Now it has been reformulated to black and is just OK, but it worked fine for this application.


My first observation was that with clear liquid, I wasn't going to be able to see the witness marks at all.  As it turned out, it was quite easy to gauge level using the cross hair that holds the center aperture.  The next task was to get an estimate of how much angular variation I was getting.  I set the rifle up on a stand and measured the cant from dead center to the bubble fully off to the side (edge of bubble on the centerline)  That came right to 4 degrees.  Next, I got on one of the free web-based ballistic calculators, and with a few reasoned estimates for muzzle velocity and ballistic coefficient, I
had the bullet drop at a number of ranges for my gun.  I zeroed the inputs so it reads as if the gun is pointed perfectly horizontal at the center of the target.

The numbers go like this:


Range Drop Offset at 4 degree cant
0 0 0.00
50 2.9 0.20
100 11.5 0.80
150 26.33 1.84
200 47.9 3.34
250 76.71 5.35
300 113.24 7.90
350 157.93 11.02
400 211.22 14.73
450 273.51 19.08
500 345.18 24.08
550 426.6 29.76
600 518.12 36.14


The offset numbers are simply a calculation of the length of the opposite (sine) leg of a triangle with the bullet drop as the hypotenuse.
As you can see, at 200 yards, a 4 degree cant amounts to 3.34" offset.  I figure my normal variation is about half this, but it could be in both directions, so it adds up to some real numbers.

The next step was to do some physical testing.  Off to the range.  I shot 2 groups of 10 rounds each at an identical round target and each with the same sight setting.  The first group was shot with the bubble as centered as I could make it.  The second was with the bubble off to the side the 4 degrees mentioned previously.  When all was said, done, and measured, the difference in the two groups was 4.28" in the horizontal direction.  This is a bit more than expected, but certainly in the ballpark.  They were almost identical in the vertical direction, which is to be expected.

One additional positive in all this is it gives a stable way to adjust for wind variation.  The traditional method for wind doping is to set up the sights for whatever the "standard" wind conditions are that day, and then just wait for the wind to match those conditions and take your shot.  On a blustery day, those conditions may not come along often enough and some sight adjustment and guesswork occurs.  By knowing how much offset I get from a certain cant, I can quickly and accurately "lean in" some Kentucky Windage and not have any sight fiddling involved.  It allows me to leave my sight picture unchanged and I always have a perfect "zero shot" when wind returns to normal.

Sunday, July 17, 2011

As Ray Charles says: "Just a Little Bit of Soule Now."

At most matches I would chase my tail a bit on the sighting in.  My groups are large enough that if a shot is say, left and low, I don't know if that's truly a sighting correction needed or it was just that particular shot out of whack.  It isn't so bad when sighting in the rifle, because I can shoot groups of 3 or 5 rounds and get a good general center.  Where it becomes a problem is during a scored session.  The temptation is always there to react to an off shot and I can end up over-correcting, or even going the wrong way.  What makes this worse is that my rear sight is a bit "wiggly" and I'm always second guessing the repeatability.  It is the cheapest Pedersoli you can get and it just doesn't stand up straight and firm on the spring like it should.  Also, the hinge is a bit floppy side to side. 
So, with money no object, I went and bought a new Lee Shaver Soule style sight.  The mounting holes are exactly the same at 1.52" so it bolted right on.  You can see it here, mounted, next to the old one I removed:


Not only is it nice and rigid, it has threaded windage adjustment (the old one was a simple slider) and a true vernier scale for elevation.  I'm not sure how many people still know how to use a vernier anymore, now that the slide rule is dead.  I won't teach you here.  You can learn on the all-knowing-interweb.  I'll just say it rocks.  Two other nice features are an easy adjustment for tilt of the ladder and an eyepiece with various selectable apertures.
Did it help my scores?  Yeah, a bit.  The biggest change was that any adjustment seemed to have a very direct and proportional change in impact.  This was a new and pleasant experience.  I liked it enough that I added the Lee Shaver site to my links list.

My current cost per shot is $3.29.
Current percent shipping is 8.56%

Sunday, July 3, 2011

Getting the lead out.

I usually find discussions of cleaning techniques as pretty dull conversation.  Black powder is water soluble.  Bullet lube is oil soluble.  Alternate soapy water and a solvent until everything is clean.  Simple, right?

I normally run 3 wet patches and one dry between each volley in competition.  This is about 10 rounds, though I just did 20 earlier today with no ill effects.  By the third patch the barrel feels smooth and all the "crust" has been removed.  When I get home, I run a number of wet and then some solvent such as Hoppes#9.  Again everything is smooth and clean.  I had heard of the horrors of lead accumulation, and bought some JB paste.  it seemed abrasive, which ooged me out a bit, but I tried it.  The patches certainly come out black, but I'm not sure they did much to the barrel.   Then one day, inspiration struck.

I had done my normal scrub out and was looking to do something "more".  I grabbed a can of what I call "contact cleaner" which is used to clean electrical points on old crusty motorcycles.  It is a powerful solvent.  The stuff I actually grabbed was "brake cleaner" to clean brake components, but I'm convinced they're the same thing and I use them interchangeably.  I'm pretty sure the stuff will take off varnish wood and maybe blue off steel, so be careful.  A little blast down the bore and a bit on a patch and give it a try.  The patch felt "crusty" in what had just been a smooth bore.  When I pulled it out - sparklies.  Like this:


These look a little dirtier than normal, but you get the idea.  Within 2 patches with brake cleaner the patches run smooth again and come out clean.  Be sure to oil well afterward.  The solvent takes all the protective oil off.  Also, I usually drop a patch in the chamber to absorb any dribble so the action doesn't get stripped of oils.

The stuff I've used is shown here:


The Shooters Choice in the middle claims to clean lead, but I don't find it does anything at all to anything.  Smokeless shooters may like it, but I'm not convinced they need to clean their guns at all.

Anyway, take it with a grain of salt, try it yourself, whatever, but I was surprised how much crud it drew out of a "clean" barrel.


Current $ per shot = $3.64
% of money as shipping = 8.57%

Saturday, June 11, 2011

Flinch

When standing behind a mule, and that rear hoof comes hurtling back to hit you, it is not natural to just stand there and let it happen.  This is, in essence, what we're asked to do with the old Trapdoor.  The thing kicks hard.  There's no denying it.  Any load I concoct to reduce recoil simply doesn't shoot well.  I've been struggling, but have found a few tricks that help.

My first try was to put on a rubber butt pad.  That didn't do anything but mess up my trigger reach.  I think the rubber was too soft and allowed the gun to accelerate before it hit my shoulder.  Later, I got a strap on pad from Buffalo arms.  Nicely made, it is leather and canvas and wraps up over the shoulder, so it works from prone through standing positions.  I was worried about the padding, because it seems thin at 1/2 inch or so, but it works like a charm.  Even in prone, where I'd really had problems, I was quite comfortable.


In this photo you can see how it has an under arm strap that keeps it secure and rolls up over the shoulder.  I give it 2 thumbs up, especially since it allows me to shoot prone, so my scores should improve.

If you look closely at my right elbow you'll see a small wound healing.  I shot a loaned M1 Garand in our local club's Vintage Rifle match.  The recoil wasn't bad, but each shot pushed my shoulder back and dragged my elbow with it.  It simply scuffed on the mat.  After 50 rounds, I was bleeding.  An elbow pad may be in order.  Next month is "Trapdoor Day" at the Vintage Rifle match, but with only 30 rounds prone, so I should live.

My next flich reduction technique was to be cheap low recoil shooting.  I purchased a .22 Long Rifle adapter.  It is basically the shape of a cartridge, takes a .22 shell, and has a little adapter plug that converts the centerfire pin to a rimfire impact.  The adapter has to be removed from the chamber each time to reload, but this isn't much slower than using a blow tube, so I'm OK with it.


Here's the adapter setup alongside a loaded 45/70 round.  My round is longer because it takes a lot of reach to get the bullet near the rifling in my gun.  It shoots a bit better stretched out this way.  There's still a lot of bullet inside the case.

The downside of all this is that the adapter is horribly inacurate.  I was shooting 20 inch groups at 50 yards.  I assume the problem was a combination of a super short barrel (about an inch) and poor repeatability of the adapter in the chamber.  Oh well.  Despite the poor performance, the company (ACE, MCA) was easy to deal with so I'm putting them in my links list.  They have some adapters that shoot smaller cartridges through your existing barrel, such as a 22 LR in a .223.  I'm betting these have much better performance.  Also, Buffalo Arms sells full length .22 barrel liners for a 45/70.  They get rave reviews, but won't fit in a trapdoor because the breech is shrouded. 

I should give a quick note here about my links list.  These are all places I have used and had no problems with.  I'm not too picky, but I like shops where I give them money and they give me product and there's no hassle.  This can be hard to find in businesses that are hobby based, so I like to spread the word.  There are other links along the right side that are ads.  I don't get to choose what these are.  They are somewhat random from Blogspot though they are subject related a lot of the time.  So far, most of the ads seem OK, like Starline Brass, or Midway, so I keep them up.  The oddest I've seen was rubber band "wrist rockets" with scopes mounted.  Also, I get paid a few pennies any time you click on one of these, so click away.  My personal links list I make no money at, but feel free to click away anyway.

Lastly, my "money per shot" calculations are a mess.  Do I count 30-06 in the M1?  I was shooting to check out the match process so I could shoot the trapdoor there, so it was related, but it seems like cheating to count the rounds fired in the total.  Same goes for the .22.  It is training for the 45/70.  Do I count the ammo cost?  Do I count the rounds fired?  I finally decided to include all the costs 100% but only count non 45/70 rounds at 1/2.  Now that the .22 doesn't seem so hot and the M1 match is over, the situation may not come up again.

Current dollars per shot = $3.88
Current % of money is shipping = 9.99%

Wednesday, May 25, 2011

Pretty Before Performance.

As I unpack at the Black Powder Cartridge Rifle (BPCR) events I go to, I start to feel a bit self conscious about my packaging.  Everyone has a nice varnished rifle case.  I have a modern aluminum case.  Everyone has a nice varnished wooden "Possibles Box."  I use a nylon motorcycle tank bag.  Everyone has a nice varnished wooded ammo box full of neatly aligned 45/70 rounds.  I use a combination of plastic bags and styrofoam.  Finally, today, I set one thing right.  I have a real ammo box and I'm fiercely proud of it!

This past weekend was a festival of oldness for me.  I rode my 1954 BSA motorcycle 80 miles to a vintage motorcycle show.  My bike, a Bantam, is nowhere near show quality, but it is nice to show up on something older than a lot of the entries.  After rambling around the show and swap meet, I returned home, but stopped at some antique stores along the way.  I had two options, either a nice old leather doctors bag, or a wooden box similar to a card catalog box. 

This is what I found:


It is a microscope box from somewhere around the late fifties or early sixties.  It has nice slip joint corners but the blocking inside to hold the missimg scope was a bit beaten up.  For $4 it was mine.  Once home I chipped out all the interior blocking, added a better hasp, added the bullet holding trays (still styrofoam, but now neatly housed), and added a felt lined foam in the lid to hold everything in place during transport.  To add to the oldness vibe, the photo is taken atop a console radio/turntable with "stereophonic sound."

Open the lid, and voila:


So now I can go the range and hold my head high knowing I have an attractive ammo box.  If only the box could make me shoot better.


Current $ per shot = $3.90
Current % of the money spent on shipping = 10.2%

Monday, May 16, 2011

Continued Mediocracy

I seem to have a penny pinching issue when it comes to bullets.  When I find a new bullet I want to try, I buy a minimum order of 50 so I can test them out.  If I like the new bullet, I'm stuck reordering before the next match, and usually I don't get them in time.  If I order 100 or more, I risk not liking the new bullet and being stuck with excess lead.  This month I tried two new bullets.  The first a 500 grain cast flat base, called a Saeco 1881, like so:


The second is a swaged "Creedmoor" bullet:


The uniformity of the swaged bullet was surely attractive and it seemed to carry over to the range.  It not only outshot the 1881, but also the 530 grain bullet I have been using up to now.  The improvement was small, but it was there nonetheless.  So, my challenge? I need approximately 60 rounds to compete, forcing me to use a combination of these 2 bullets.  Not only did I have to use a bullet that was sub-optimium at times, but I also had to account for different grouping locations, an elevation difference of several inches.

Despite all this, I scored only 1 shot worse than my first time out.  I am fairly convinced some significant imrovement is afoot, if just through practice, refinement, and personal consistency.

Below is a shot of me honing in on the gong for a fouling shot:


And here is a shot of Janice, my girlfriend, taking over spotting duty.  She seemed to have fun and has been hinting at shooting herself.  Maybe a modern replica is more in order.


The plan for next month is to work up minor load variations with the swaged bullet and also to test out a .22 adapter that will allow me a lot of cheap practice time, especially to tighten up my offhand (standing) shooting.

Current dollars per shot = $3.57
Current percent as shipping = 10.6%


Wednesday, May 4, 2011

Nothing tried, nothing gained.

I got out to the range today to test a few loads and see if a modification I'd made to my cheek pad would work.  My cheek pad was giving me all the same fits it gives to anyone who buys it.  The stock is tapered slightly, so recoil makes it eventually slide down (forward) on the stock.  I punched a couple of holes and laced it back against the butt of the stock.  The knotting isn't a problem as I'm using a rubber pad, but if I ever change from that it will probably be a problem.  Here's a shot with the pad removed.


It seems quite functional.  It took a while to stretch all the laces so they were nice and tight, but in 110 rounds it didn't move a bit.  Before the added lacing it would shoot free in 20 rounds or so.  The high comb does a nice job of keeping my head high and steady.  I'd have trouble claiming my groups actually got smaller as a result, it just felt more firm.

The main test was of a bit of gunsmithing.  I went and had my muzzle recrowned.  There was a noticeable amount of wear from over a century of cleaning rods and it looked like somebody had tapped it on something in the past, leaving a little dent.  The recrown just takes a light skim off the muzzle, keeps the same shape, and freshens up the interface of the crown and the exiting rifling.  It looks all shiny and new right now, but I'm sure after a few shoots and some time it will "patina in" to be unnoticeable.
Sorry about the "sniper through a bed sheet" look, but I had to use a close backdrop to trick my cheap camera into focusing on the tip.  So, how did it work?!!!  Absolutely no different than before.  Money wasted.  Nothing tried, nothing gained.
Another thing I did today was shoot a new sabot load.  I think I've finally pushed this as far as it is going to go and declare it a failure.  Wanting a bit more weight,  I replaced the .40 caliber pistol bullets with smooth sided .399 "paper patch" bullets in the same sabot, like so:

I used 55 grains of ffg black powder.  With a bit of compression this put the crimp just forward of the sabot.

Not only were the shots all over the place, the residue in the barrel included layers of plastic in odd little snakeskins.  I'm guessing that in a muzzle loader it isn't a problem because it is already seated in the grooves, while my loads have to transition at the throat and get torn into.  Anyway, nothing tried, nothing gained.

Current $ per shot :$3.91
Current percentage of cost that's shipping: 10.4%

Monday, April 18, 2011

Failure

Yesterday was my second day in a competition.  I went there carrying 2 different loads.  One was my tried and true 530 grain bullet.  The other was a more risky 405 grain hollow base.  I new the hollow base setup wasn't as good, yet there was an emotional attachment as I had cast these myself.  Sure enough, I made the emotional choice and ended up with a poor score.  I should know from motorcycle racing you compete with the best proven setup.   Testing is relegated to practice days.

On the plus side, I'm certain my hold and stability were improved by the cheek piece and hand grip addition.  I managed to improve my score in the offhand segment despite my poor ammo choices.  Next month will bring improvment again, I'm sure of it.

My current shooting cost is $4.42 per shot, with 10.6% being shipping costs.

Tuesday, April 5, 2011

All it takes is a little money.

I've taken the unfortunate step of recording every penny I've spent on shooting this rifle.  This is usually a bad idea for any project and is proving especially bad for this one.  I knew it would be a bit spendy.  New ammo in the box runs over a dollar shot, but it was fairly amazing how quickly it all added up. 
To try and make some sense of things, I created two calculated numbers.  One is the average cost per shot of every shot I've fired.  Right now that is running right at $6.44 per shot.  At times in the past it was as high as $9 and I'm expecting it to drop below $5 the next time I go to the range.  Understand that this cost isn't just ammo.  It includes range fees, tools, and anything specifically needed in the shooting of this gun.    Obviously, the major flaw in this calculation is the fact that reloading supplies are generally bought in bulk.  I have components to make about 700 rounds of ammo.  The only problem is, if I'm not happy with the ammo I'm making now, then 700 rounds of the same won't help me.  All it takes to make me happy is a little more money.
The second calculated number is a rato between shipping costs and actual parts.  That number is currently running at 12.1%.  This is a huge number.  I can admit, a bit of it is due to heavy "haz mat" charges for powder and such, but most of it is just the fee for ordering small little parts from various vendors.  I've started to be more aware of these costs when judging the local gun shop's prices.  Sometimes it really does pay to support the small retailer.

An example of some silly expenditures?  Here's three:

The aperture sight to give crystal clear sight picture was $110 and $14 shipping
The leather comb riser to give repeatable cheek location was $30 and $9 shipping
The bolt on pistol grip to give me repeatable trigger pull with rock solid follow through was $55 and $12 shipping.
Worth every penny I tell myself, but it adds up to $230, of which 15% was shipping.  I'm not sure my groups will improve $230 dollars worth.  I'm off to the range in a couple days, so we'll see.

Monday, March 21, 2011

Victory!

Yesterday I went to the local "Tri County Gun Club" and shot my first competitive rifle match.  200 yard sihouettes with black powder single shot cartridge rifles.  I had set up my sights per the book at 100 yards to be on at 200 and sure enough, they came out about right.  I needed a little fiddle faddling, but within 20 minutes of the 1 hour practice session I was dialed in.

As you can see from the picture below, I had a built in excuse if I did poorly.

The flag would whip from forwards to backwards, right to left.  Randomness was the code for the day.

The really good guys were shooting perfect 10s, while I would struggle to hit 3, eventually improving to 6 on the "hog".  Not that I'm complaining.  The rifle has come a long way in a month and I have great expectations that it will improve further still.  The group was very friendly and had tons of advice.   I think they were glad to see a new face in the crowd.


To answer your impertinent question: yes, there was only one person in my grouping.  Just like little league softball, to participate is to win.

Friday, March 18, 2011

Another day at the range.

A day at the range can't be all bad can it?  No, not all bad, just some.  It turns out my home cast 405 grain hollow base bullets that were supposed to be the cat's meow were pretty useless.  I haven't 100% given up hope, but they don't seem too promising.  The load with 60 grains of 777 shot a whopping 24 high  X 11 wide.  The load with 65 grains shot worse at 22 high x 24 wide.  The only ray of sunshine in all this is the fact that the 2 groups vary by quite a bit due to the load.  There's the potential I could find a "sweet spot" somewhere.  There was one keyhole, which distresses me because I'm accosomed to either all or none.  It is interesting that I could hear it.  Quite a buzz. 

One thing I've been muddling over is the fact that the 777 is slightly peppier than black powder, so I use a tad less to correct.  A typical load is 70 grains BP, where I use 60 of 777.  Because of this, I'm not getting as much compression as most people recommend.  I don't know that they don't just want "all that will fit" or if it really matters, but I think my next step is a load of real black powder so I can get some compression of the powder.

When I came home, what do I find on my doorstep but the bullets I ordered from Mt. Baldy.  this was horrible timing in 2 ways.  First, I couldn't try their 405 grain hollowbase bullets, and second, I couldn't shoot my 500 grain rounds because I need them for a competition Sunday and I had no bullets to reload. 

When I crack the boxes, I do find that the Mt. Baldy bullets are slightly different than mine.  Take a look.


The one on the left is Mt Baldy, the one on the right is mine (Lee mold).  The base of the baldy is bigger diameter and rounded in a sort of parabola shape.  I think it will deform to the bore much easier.  Alloy is supposed to be 20:1, same as mine.
Here's a side shot:


Again, Mt. Baldy on the left.  The Baldy's are sized, so that gives it a different appearance to the lands.  They're pretty similar otherwise.  You may wonder how I get them to stand up like that.  Sunday is the first day of spring, the Vernal Equinox.  Fresh eggs and bullets are easy to balance on that day.  In fact, if you leave some loose on a table Saturday night, some will be standing on Sunday morning.  Try it.

So what was good about the day?  Two things.  
First, my aperture sight and globe front that I got From Dixie Gun Works is awesome.  Everything is clear and steady and visible.  Two thumbs up. 
Second, I seem to have gotten my sabots working a lot better.  If you remember last time I shot them with a smokeless load of 12gr SR4759 and they were weak and all over the target.  They also left a lot of powder unburned.  I transitioned into 30 gr 777.  With the black powder substitute I could just press the sabot clear into the case and not crimp it.  It holds quite firm in a sized case.  The pattern was 5 wide by 3.25 high for 10 rounds.  This is pretty much equivalent to my best 500gr lead bullet round.  I tried a load with 40 grains 777.  It was similar at 4 wide x 5 high.  It is looking interesting anyway.  The bore had a bit more fouling, but that's to be expected with the light bullet and load.

Tuesday, March 8, 2011

What does a bell shaped curve look like?


Well, like this I guess.  It is a little lopsided, but you get the idea.
The first thing you'll notice is that the column on the right, where it has the number 11 written, has 12 bullets in it.  Lead poisoning affects math ability.

I decided to throw some bullets up on the triple beam to see what sort of consistency I was getting.  It turns out my "500 grain" bullets run from 519 to 532 grains.  I bought these lubed, so I'm including lube weight in this measure.  This is over 2% variation, which seems like it could matter.  Sorting brings me to about .35%, which I can't imagine is noticeable.  Testing will tell the tale.   I had expected that the ordeal of weighing each bullet would turn me off of this project, but when you're just trying to sort into a 2 grain range it goes fairly quickly.

The first handloads.

Every step of the way requires a fiddle and adjustment.  Right out of the box I find my decapper won’t work because I don’t want to resize the cases and the die does these two steps at once.  I get a new decap only die and it works like a charm.  Why not resize?   It isn’t necessary if I always use the same rifle, may be more accurate, and may make the little press last longer.
After decap, I drill out the flash hole to .096 as the Wolfe book says is a MUST.  Then I clean, dry and recap with magnum primers. 
Now to pick my loads.  I have 2 types of lead bullets.  One is 405 grains, the other 500 grains.  Both are copies of the original bullets for this gun, except the 405 is a flat base where the original was a hollow base.  I have sourced some hollow base bullets and they should be here any day.  I do a smokeless and a black powder load for each at about 60 grains equivalent.  I have some copper jacketed sabots too.  These are 200 grains, which is a bit off the mark, except I’ve seen loads that use 220 grain pistol bullets for practice rounds, so I figure I’ll give it a shot. 
Time to head back to the range.


A day at the range is fun, but I always feel like I'm just wasting ammo and time if I'm not trying to improve something, even if it is just me.  This day I had 10 rounds each of 5 different loads, plus some duplicates of loads I thought had promise.  The surprising thing was how really bad the bad loads were.  One of the loads was measureably better than any purchased ammo, but some of them made gigantic patterns and went through the paper sideways.


The loser was anything with a 405 grain flat base.  The pattern was either narrow and tall (like 12 inches tall) or completely shotgunned allover the place.  Black powder, smokeless, it didn't matter.


The winner was a 500 grain flat base with 60 grains by volume of 777 blackpowder replica.  It shot 6 inches wide and 5 inches high at 100 yards.  I was using a blade front sight with an aperture rear, so I think I can make some of that go away with my aiming.

The "interesting" round was the sabot.  These rounds were very lightly loaded to mimic the "gallery" round from the Wolf book.  I almost laughed out loud at how soft and quiet it was.  I was using smokeless powder (12 gr SR4759) and it left a lot unburned in the bore.  The group was 13 high by 15 wide, which is awful, but all the rounds went through straight.  I found a spent sabot and it looked like it took the rifling.  I think it may be time to play with stepping up the load on these.

Here's a photo of a new sabot/bullet and the spent sabot.


My next step is to get my hands on those hollow base 405 grain bullets.  They seem to be more elusive than I thought.  I also need to mount a globe sight on the front so I can get that nice "circle in a circle in a circle" picture. 

Saturday, March 5, 2011

Fiddle and fuss with sights.

About a week ago I went out to the local range and watched a black powder rifle competition.  Everyone was using what looked like a falling block action, but a trapdoor will fit right in.  I got to shoot one and I was very impressed with the sight picture from the aperture (peep) sight.  So, naturally, I felt I needed to spend money.
One of my concerns is that I don't want to modify the rifle in any permanent way.  The photo below is my solution.


The brass plate attaches to 2 screws that hold the action together.  It wraps up and around the stock without actually touching.  There are still a few swirl marks to polish out, but it is looking pretty good even so.


Above is the plate at the halfway point.  It is a 1/4" backing plate to a commercial doorknob mount.  I had to work around a few screw holes to get it to fit.


This shows the right hand side.  The plate is a bit higher than I'd like.  I'm sure a better craftsman could do a better job.  Next step is a trip to the range for some testing.

Lies, Damned Lies, and Statistics.


I’ll be using this project as an excuse to start learning and applying statistical methods.  I’ve had a bit of exposure in school, but lack much real life experience, so the methods aren’t really at my fingertips.  Riflery is a prime place to use statistics as every practice session can become a data gathering exercise.  As I go through this, I’ll make every attempt to speak in English instead if Math, and go step by step.  I assume most shooters have no real statistical expertise.

I had always believed that the quote used as a title of this section was a Mark Twain line.  It turns out that not only did he not originate it, but he attributed it to someone who didn’t say it at all.  With fact checking like that, no wonder he hides behind a pseudonym.  The only information historians have been able to dig up is that it originated somewhere in the late 1800s.  I’m taking it upon myself to assume the origination date was 1877, the same year my trapdoor rifle was made.  I may be wrong, but there is a statistical possibility that I’m correct.  Ha!

OK, why statistics?  The whole idea is to use a little math to tell us something that isn’t obvious just by looking.  For instance, look at the 2 target groups that were posted previously.  They both look pretty similar.  By measuring the overall spread of the groups or measuring the smallest circle that will hold each group, we can tell that one is somewhat smaller than the other.  The question is, are the two groups so different that one ammo is better than the other, or are the two essentially the same and it was just raw luck that one group was a tad smaller?

Most basic statistical tests compare one set of values to another to see if the averages of each group are different.  Unfortunately, on a rifle, I can adjust the average to anywhere I want.  The two groups we’re looking at were centered over 12 inches apart, but with a tweak of the sights I could have put them right on top of each other.  The  feature I’m interested in is size of the group, or to say it another way, the distance of each shot from the center of the group.  The number for the average distance from each shot to the center of the group is the Standard Deviation.  If you check it out in a formula, there is some trickery to make it all come out positive and a small correction for the fact that the group is a small sample of all the shots using that ammo, but still, that’s the gist of it.  So now, we can calculate the Standard Deviations for the 2 groups and compare them.  I am splitting the measurements up into horizontal (X) and vertical (Y), so we’ll have 2 comparisons.

Horizontal:
Stand. Dev for Remington 300Gr X=2.03
Stand. Dev for Ultramax 405 Gr X=1.76

Vertical:
Stand. Dev for Remington 300Gr Y=1.75
Stand. Dev for Ultramax 405 Gr Y=1.97

You can struggle through these calculations by hand with a text book, but I recommend a spreadsheet program like Excel.  It has all the statistical formulae programmed in, but it won’t tell you when you should or shouldn’t use them.

So how do we compare these numbers?  The plan is to take the “F ratio,” which is just squaring the standard deviations and dividing one by the other.  For the numbers above:

F horizontal= 2.03 X 2.03 / (1.75 X 1.75) =1.32
F Vertical= 1.97 X 1.97 / (1.76 X 1.76) = 1.26

Then we check out a chart of how likely it is to get these numbers.  Again, I’m going long hand by checking a table, but Excel can do it all automatically with the “Ftest” function.  On the table, I get 2.25 and 2.17.  Since both of these are larger than our 1.3ish numbers we have no real certainty that the ammo is any different and any group differences were likely just chance.

So what now?  Well, we can try some other ammo.  If we think there is really a difference between the two we can redo the test with an attempt to reduce variation from other things.  For instance, if a better sight and a smoothed trigger can give me tighter groups, then maybe a retest of the ammo will be able to show a real variation.  Also, an increase in sample size, say 50 rounds of each instead of 20, will make it mathematically easier to show a difference, if one exists.  Common sense wise, I’m shooting an 8” when I should be shooting 3” or so.  I don’t think chasing this small difference is worth my effort right now.

Sunday, February 27, 2011

When Purchased Ammunition Won't Do

I picked up a book devoted to the Trapdoor Springfield in 45-70. There was also a short lived trapdoor in .50 and others exist that were not US military, but they are not included in the book.  The book is rich in info including sights and their function, various loads, history, trigger dressing, etc. 
You can find it here: http://www.the45-70book.com/
It is looking like I’ll need to be reloading in order to get any accuracy out of the thing.  I’m slowly gathering the things I need; powder, primers, bullets of every type and size imaginable.  My father had a reloading press that is older than dirt.  What could be better for this project?  The Lyman Tru-Line Jr is outdated and won’t take modern dies, but at free, how could I refuse.  A little time on Ebay and I had a new turret on the way to fit new dies.  Midway USA sells an adapter for the case holder that all the reviews say is fragile junk, but if you need it, you need it.  Included with the press came a scale and a charge thrower (powder measure).  By the time I bought all the adapters and knick-knacks, it might have been cheaper to just buy a new press.  Oh well, the Tru-Line has a loyal following.  100s of old coots can’t be wrong.  Right?
Lyman Tru-Line reloading press with a turret for modern dies.

One immediate help from the book is I discover the rear sight is installed upside down.  This may sound odd, but it easier to do than you think and it actually works fairly well inverted.  Anyway, I fix that and also built a new raised front sight by soldering a blade onto a front sight shroud.  It lets me find a setting on the rear sight that will be dead on at 100 yards.  The old front sight is still there, so I can go ahead and raise the rear sight ladder to take those 1600 yard shots if I feel like it.  Of course, that gives me a roughly 128 inch diameter group, not counting wind.  Hmm.


First Firing

After a bit of searching the internet (the source of all truth and knowledge) I ordered up some ammo.  This is a bit more intense a deal than with most guns.  The caliber has been around since the dawn of the metal cartridge.  It has progressively been used in stronger and stronger guns with hotter and hotter loads.  It is entirely possible to buy factory ammunition off the shelf that will blow a good Trapdoor to smithereens.  Owie-boo boo.  I finally settle on loads with “Cowboy Action” lead bullets from Ultramax and 2 different weights of jacketed bullets in mellow loadings from Remington.
Off to the range.  I have some GIGANTIC targets because I know the gun hasn’t fired in 50 years or so and I have no idea where it hits.  I want to start at 50 yards and work my way out, but the coppers have exclusive access to the 50 range this day so they can practice shooting bad guys.  I start out at 100 yards.  Sure enough I can’t hit the target.  With a little help from someone at the range, I discover I am shooting way high.  I later learn that with the sights at the lowest setting it is designed to hit dead on at 260 yards away. 
With that figured out, I can aim at the bottom of the GIGANTIC bullseye and hit near the top.  Time to shoot a box or 2 of ammo and see how she does.  Miserable.  Both the Ultramax and the Remington ammo shoot about 8” groups.  This is worse than double the size Custer’s men were doing, and they still lost.

405 grain Ultramax

300 grain Remington

I measured the holes and popped the info onto a spreadsheet.  I also split the info into vertical (Y) and horizontal (X) components.  My father claims the vertical component is from the gun and the horizontal component is because I sway like a drunkard standing in a canoe, or something to that effect. 


The best fit line through each group can sometimes be helpful figuring out what is causing the scatter, but these groups are round enough that I don't think there's much here to learn.

The project begins...

Not too long ago, my father started giving me some of his firearms.  This was partly a need due to storage concerns, but also a realization that he wasn’t using them anymore.  I soon developed the opinion that a rifle hanging in a rack isn’t really worth much if you don’t use it on occasion.  This is an ongoing saga of my quest to make a Trapdoor Springfield shoot, and maybe shoot well.  It will be a way for me to document my path, series of failures, and occasional successes so I can remember them, and others can learn from them.
The gun is a model 1873 in the then newly created 45-70 cartridge.  It was actually built in 1877, one year after Custer’s last stand.  There appears to be no good way to know the real history of this particular US military rifle as they made gazillions of them for 20 years and continued to use them through the Spanish American War.  They continued in service in the Reserves past WW2.  I do know, from the lack of a “cartouche” or inspection stamp on the stock, that the stock was probably replaced somewhere in the mists of time.  I also know that despite having a bayonet, it was not originally issued one.